How to burn a custom music CD?
Many people collect many CDs and love various kinds of music style from different artists. You may want to burn some classic music songs from different CDs into one music CD, and create custom CDs for friends, family, and yourself. This article will tell you how to burn your own music CDs with the software Xilisoft Audio Converter Pro.
The program Xilisoft Audio Converter Pro is a powerful all-in-one professional audio converter for audio conversion, audio extraction, audio CD Ripping and making. Using Xilisoft Audio Converter Pro, you can convert music CD to different audio formats, and create music CD from audio and video files in all sorts of formats.
Guide: How to make a custom music CD?
You only need two parts to burn a custom music CD.
Firstly, please convert the original CDs to your computer.
Secondly, choose your favorate songs and add them to our program and then start to burn a custom music CD.
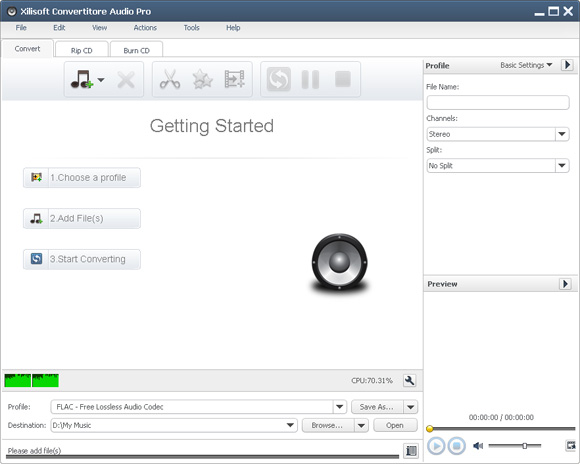
First, download Xilisoft Audio Converter Pro, install and run it.
Part 1: Convert Audio CD
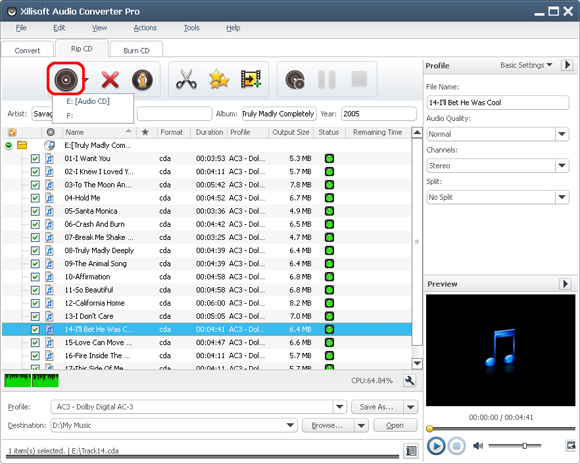
Click “Convert CD” tab in the main window to switch to “Convert CD” window.
1. Load audio CD
Click “Load Audio CD” Button in the tool bar and load the CD you inserted.
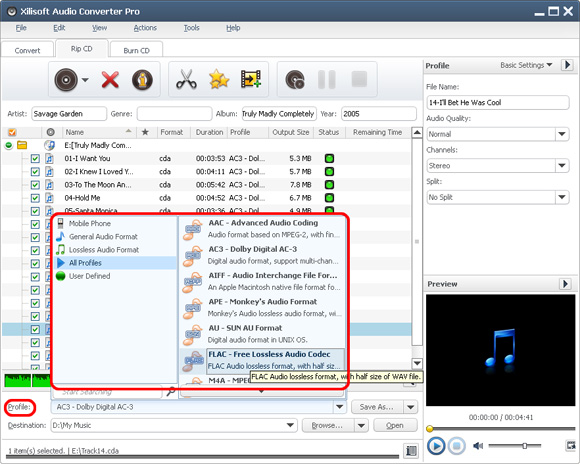
2. Set output profiles and Choose destination
Select a file in the list and click Profile drop-down button to choose the wanted output profile in the “Profile” drop-down list that opens. Click “Browse…” button and select a folder for saving the output files in the dialog that opens.
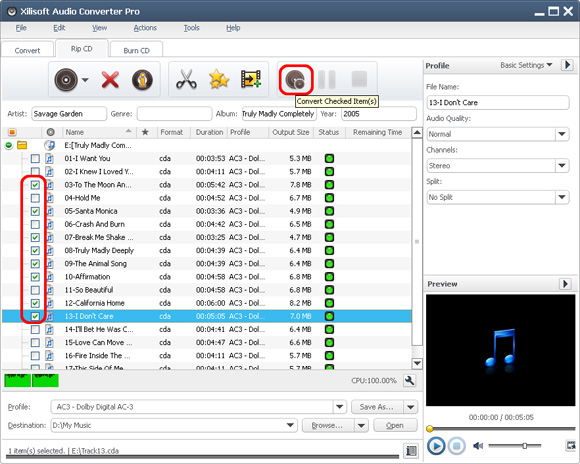
3. Start converting
Check the wanted files in the file list and click “Convert Checked Item(s)” button to start the converting. You can check the converting progress by the Status bar on the bottom.
Part 2: Burn CD
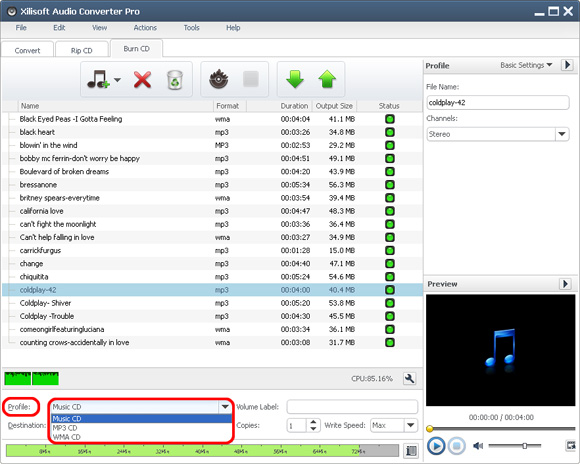
Click “Burn CD” tab in the main window to open the "Burn Audio CD" window.
1. Add files
Click “Add File(s)” button on the toolbar, choose one or more files in the dialog that pops up, then click “Open” to import the selected files into the file list in the main window.

Or, click “Add File(s)” drop-down button, choose “Add Folder” option, then select the wanted folder and import all the files in the folder to the file list.
Tip: You can also add files by choosing “Add File(s)...” or “Add Folder...” option from File menu.
2. Set output profiles and Choose destination
Click "Profile" drop-down button to choose the wanted CD type in the Profile drop-down list that opens. Three CD types are available: Music CD, MP3 CD, and WMA CD. If you have more than one drive, choose the drive from the “Destination” list.
3. Start burning
Click “Burn” button to start burning CD. Click “Stop” button to stop the burning if you want.
After conversion, you will get your own CD.


