Xilisoft Mobile Phone Manager Tutorial
This guide provides introductions about how to use Xilisoft Mobile Phone Manager, connect your phone to the PC, and start using Mobile Phone Manager.
- User login
- Backup device data
- Restore device data
- Copy local data to phone
- Copy phone data to local
- Synchronize data
Note: Before using Mobile Phone Manager, there is something you need to do.
Click and download Microsoft ActiveSync: For XP For Vista
If you use a Bluetooth wireless technology connection to connect the PC and your phone, install any required Bluetooth adaptors or software before you use Mobile Phone Manager. To use a cable to connect the PC and your phone, you need appropriate cable drivers on your PC.
-
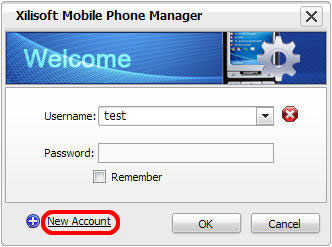
Run Microsoft ActiveSync and Xilisoft Mobile Phone Manager. Here, User Login window appears. Select your user name from drop-down list and enter password to sign in.
Tips:
A. Click New Account to create a new account if you are a new user.
B. Click Delete Account if you want to delete one account. -
Click Add Phone button at the right top of main interface and select a connection type.

A. Connect your phone via cable
In Connection Wizard, select USB Cable as connection type. Connect the cable to the PC and click Next. Select your phone from the USB Cable list and click Next. When it prompts you successful connection, please click Finish. You will see related items of your phone appear in the left tree list.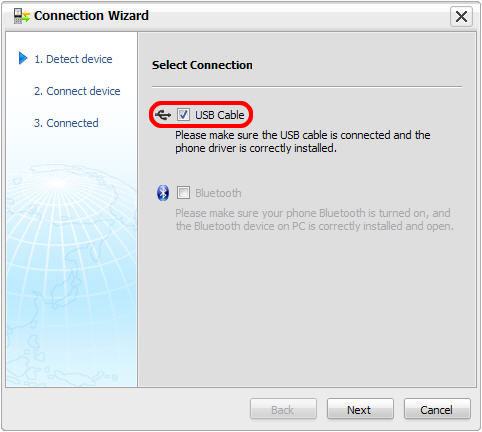
B. Connect your phone via Bluetooth
Make your phone visible to other Bluetooth devices and activate the Bluetooth connection of your phone. Make sure that the Bluetooth stack on your PC is switched on. If you use a Bluetooth adapter, make sure it is plugged into the PC.
a) Select Bluetooth and click Next. Your phone name will appear in the device list after finishing detection.
b) Then, check your phone name and click Next. It will pop up a Bluetooth match window. Enter any password you like. Here, your phone also prompts you to enter paired password.
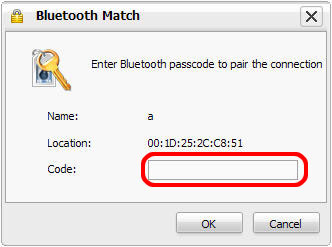
Note: The password you enter in Bluetooth match window is the same as the one your phone prompts you to enter.
c) When successful match, please click Finish. You will see related items of your phone appear in the left tree list. -
Back up phone contents on PC
A. In the left tree list of the main window, click a phone or local node you want to backup, then its information is displayed in the right window.
B. Click Backup data to PC icon at the bottom to open Data Backup window and check the items you want to backup.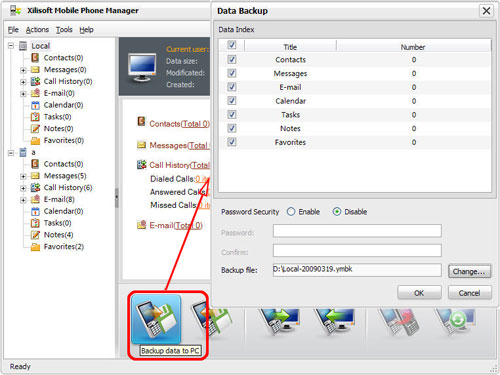
C. If you do not want to backup to the default path, then click Change button to change the storage path and file name.
D. Click OK to start the backup.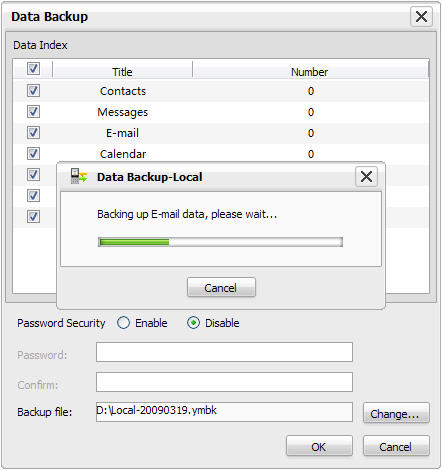
-
Restore data
Click Restore data by the backup icon at the bottom to open Restore Data window. Select a backup file from the list of content types available or click Add to select the backup file from local. Check what you want to restore and click OK.

-
Copy local data to phone
A. Click Copy local data to phone button at the bottom and pop up Data Copy window. Select one of the following solutions to continue:
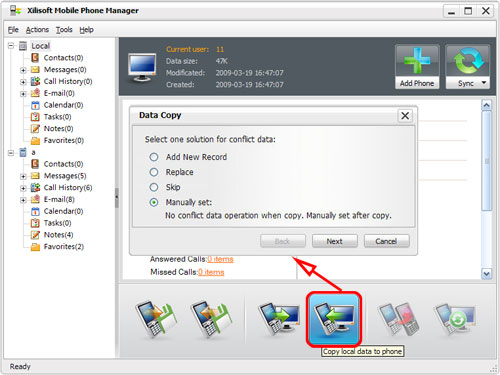
a) Add New Record: not overwrite original data, but add new record data.
b) Replace: replace original data.
c) Skip: skip the same data and keep the original data.
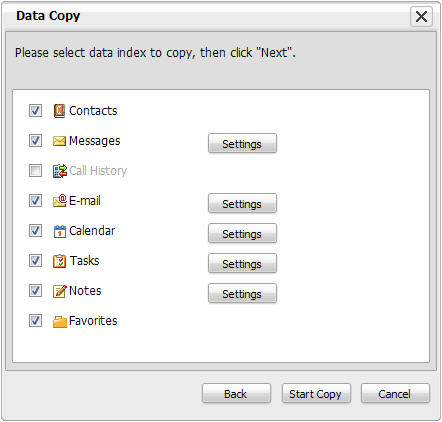
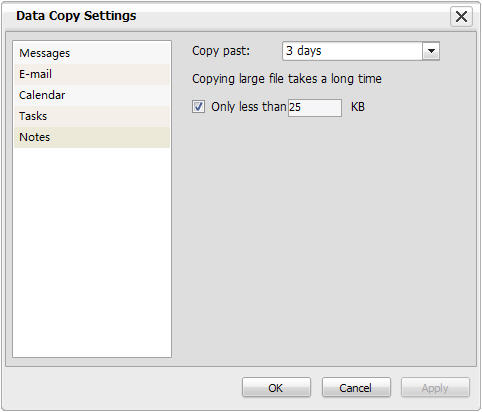
d) Manually set: not process conflict data when copying data, but process conflict data manually when copy finished.B. Check one solution and click Next. You can adjust the settings of Messages, Email, Calendar, Tasks and Notes.
C. Click Start Copy to copy data.
Tips:
a) If there are multiple phones connected to your PC, the program will remind you of selecting the phone you want to copy data to.
b) Copying data will overwrite the original data. Please backup phone data before copying in the case of losing original phone data. -
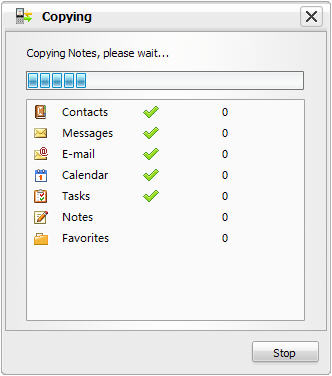
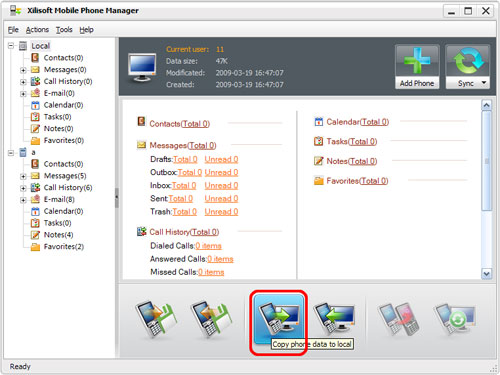
Copy phone data to local
A. Click Copy phone data to local button at the bottom of the window to open Data Copy window. Select one of the following solutions to continue:
a) Add New Record: not overwrite original data, but add new record data.
b) Replace: replace original data.
c) Skip: skip the same data and keep the original data.
d) Manually set: not process conflict data when copying data, but process conflict data manually when copy finished.B. Select one solution and click Next. Check what you want to copy and click Start Copy. You can adjust the settings of Messages, Email, Calendar, Tasks and Notes.
-
Synchronize data
A. Click Sync icon at the bottom and open Data Sync window. Select one of the following conflict data rules:
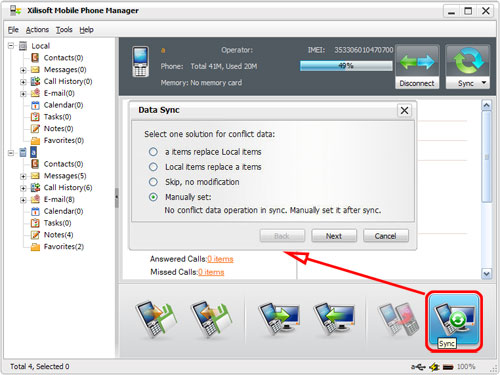
a) Local items replace phone items.
b) Phone items replace local items.
c) Skip, no modification: skip the same data and keep the original data.
d) Manually set: not process conflict data when copying data, but process conflict data manually when copy finished.B. Click Next and check what you want to sync from the list. You can adjust the settings of Messages, Email, Calendar, Tasks and Notes.
C. Click Start Sync to synchronize data between phone and local.