How to Make a Perfect PowerPoint Presentation DVD?
This tutorial will guide you how to convert a PowerPoint files to DVD discs by using Xilisoft PowerPoint to DVD and take presentations on DVD players.
Tips and Tricks
How to Record Narration in Presentation Rehearsal?
How to Add Watermark to Your Presentation?
Step 1: Start
Download, install and launch Xilisoft PowerPoint to DVD.
Step 2: Add PPT Files(s)
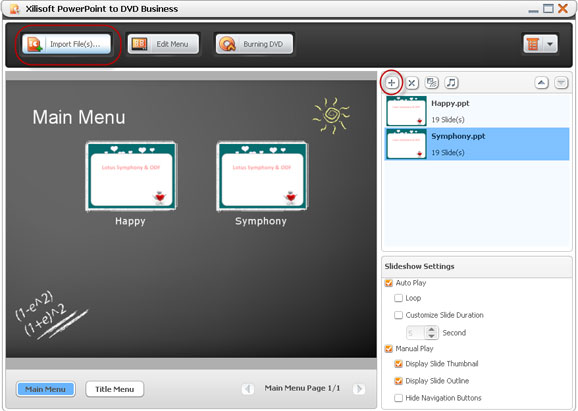
Drag and drop PowerPoint file(s) into file list or Click “Import File(s)” button to add PPT file(s).
Step 3: Adjust Slideshow Settings
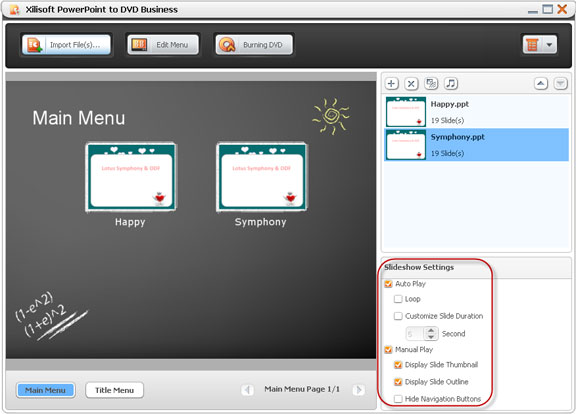
Adjust slideshow settings to play automatically or manually.
Tips:
1. In Auto-play mode, you can set the slide to play in loop or customize slide duration.
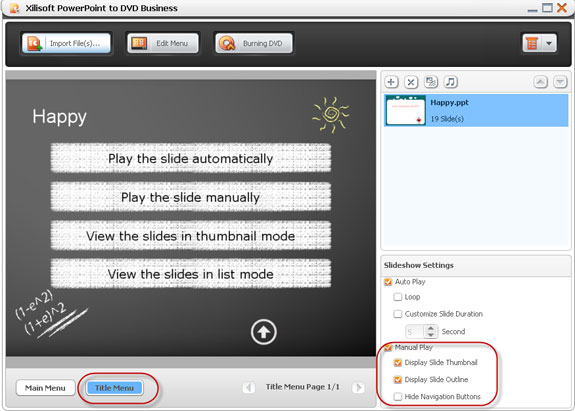
2. In Manual play mode, you can decide to display the slides in thumbnail or outline view. You can also hide the navigation buttons at will. You can preview the applied effects of different menu templates by click “Title Menu” at the bottom of application.
Step 4: Create and Design a DVD Menu
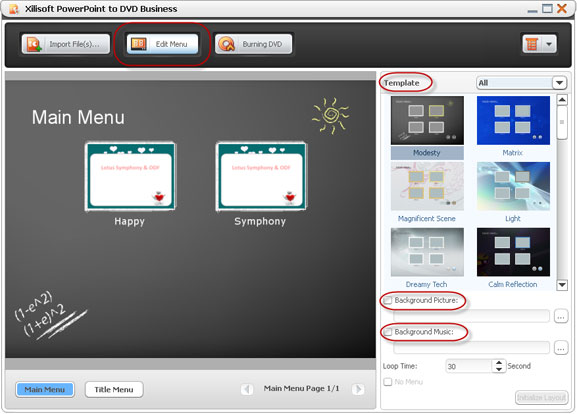
Click “Edit Menu” button to create and design a DVD menu. Choose one menu template and add background music/picture into it.
Step 5: Start to Burn
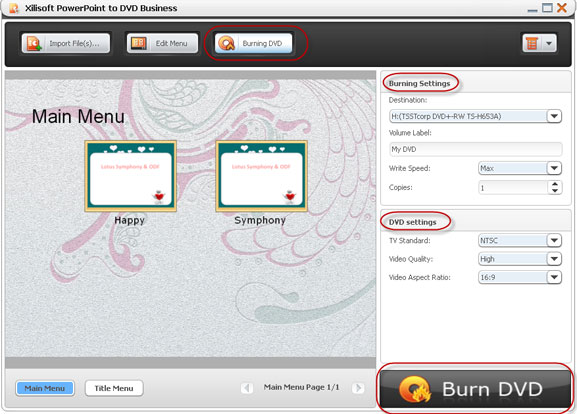
Click “Burning DVD” button at the top of the application and hit “Burn DVD” button at the bottom to start burning!
Tips:
Burning settings are provided, such as volume label, write speed, copies. DVD settings can be adjusted as well, including TV standard, video quality and video aspect ratio.
How to Record Narration in Presentation Rehearsal?
Record a voice narration into your PowerPoint file easily as an instruction by the following steps:
1. Select the PowerPoint file needs to add narration and click ![]() button.
button.
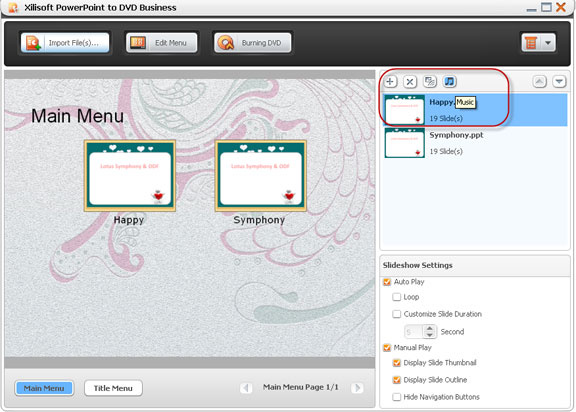
2. In Auto-Play mode, check “Presentation Recording” option and enter rehearsing process to preview PowerPoint file in full screen.
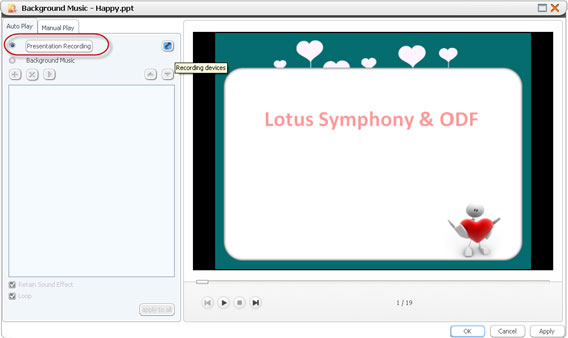
Click “Presentaion Recording” button to start recording narration.

And click “Stop Recording” button to end the narration.

3. In Manual-play mode, click ![]() button to start recording and hit
button to start recording and hit ![]() button when the recording is finished.
button when the recording is finished.

How to Add Watermark to Your Presentation?
If you want to logo your PowerPoint file, please follow the below steps to add text/picture watermark into it.
1. Highlight the PowerPoint file needed to add watermark into and click “Watermark” button on the left of the main interface.
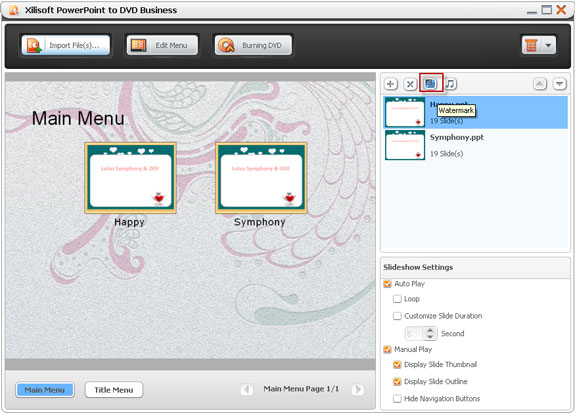
2. Click "Add Text Watermark" or "Add Picture Watermark".

3. Set Transparency, Position, Font, Color, Size, or Style for watermark, play and preview slide show in comparison.
4. Click "Apply" and "OK" to finish editing.


