How to create a custom profile for converting video files?
We often need to optimize video bitrate, frame rate and frame size when convert videos to the playback device. These settings will help compress the video while keeping a good quality. The software Xilisoft Video Converter Ultimate can help you customize your own profile and get your videos up to size while keeping the crystal clear image.
This guide shows how easy it is to create and save custom profiles you can use time and again when converting your videos.
Step 1. Load the video
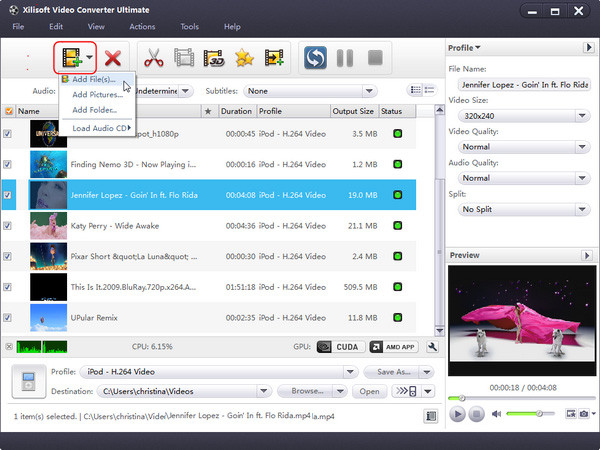
Click “Add File(s)” button on the toolbar or select “File> Add File(s)” on the main menu to load files.

Step 2. Select the format you want to convert to
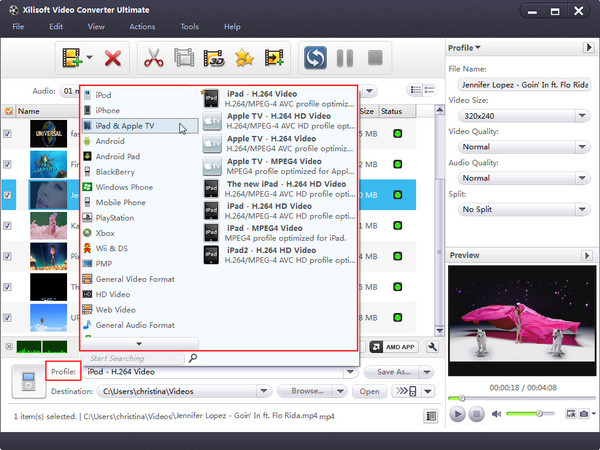
Select the files need to be converted and click “Profile” button to select the output format in the drop-down list.

Step 3. Change bitrate, frame rate and video size
Open the “Advanced Profile Settings” panel on the right, and change bitrate, frame rate, video size as you need. You can also change bitrate, sample rate and channels for the audio track.
Tip:
Change video bitrate – better compression
Set the video bit rate in kilobit per second. This is the key factor that is related to the output file size and video quality -- the larger the bit rate, the better the video quality and the bigger the output file you will get, and vice versa.
Change video resolution
The format is 'width x height' like 320x240, 640x480 or 1920x1080 pixels. You can choose an similar size for your playback device screen resolution.
Change video frame rate for optimal view
Set how many frames should be displayed per second (FPS). Higher frame rate increases the smoothness when played back, and usually 25--30 frame per second can provide you with a very good viewing experience.
Step 4. Save the custom Profile
After settings, click “Save as” button to save the customized profile. You can give a name to the new profile.
Step 5. Select your profile from the list to convert
If you want to convert videos with your customized profile, just select your profile from the list to convert the files.


