Xilisoft Audio Maker Tutorial
Referring FAQIntroduction
Xilisoft Audio Maker provides an All-in-One Audio Conversion Solution – Audio Converter, CD Converter, Audio CD Burner.
- As an Audio Converter, it not only provides an easy and completed way to convert between all popular audio formats, such as MP3, M4A, WAV, WMA, MP2, OGG, AAC, AC3, APE, FLAC, AU, etc., but also convert video files including AVI, MPEG, WMV, ASF, MOV, MP4, 3GP, 3G2, RM, H.264/AVC, M4V to your favorite audio formats.
- As a CD Converter, you can use it to convert Audio CD to popular formats such as MP3, M4A, WAV, WMA, MP2, OGG, AAC, AC3, APE, FLAC, AU, etc.
- As an Audio CD Burner, it can help you to convert and burn audio files to Music CD. It supports burn Music CD from AVI, MPEG, WMV, MPEG-4, 3GP, ASF, MOV, RM, MP2, MP3, WMA, WAV, AU, M4A, RA, OGG, AC3, etc.
How to use the three main functions? It's simple! Please follow the three How-TO ways below:
Download, install and run Xilisoft Audio Maker.
How to convert audio files?
-
Select Audio Converter function by clicking "Convert" tab.

-
Add files by clicking "Add" button on the main interface or select "Add File…" in the "File" menu.

-
Open the original file information dialog by double-clicking the selected original file. It will tell you the preferences of the original file, such as: Audio Format, Bit Rate, Sample Rate, etc.

-
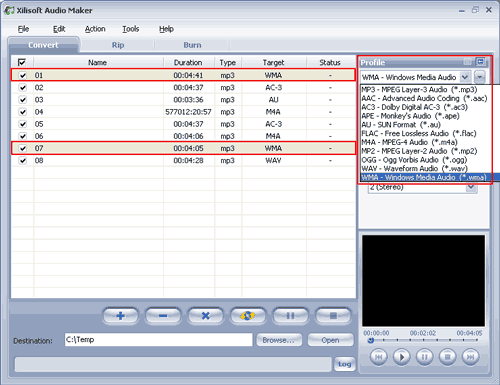
Specify the target file format you want to convert. Highlight one or several files you loaded first and then select output profile from "Profile" combo-box. For example, if you want to convert the first and third files to WMA format, you should highlight the two files and then select " WMA – Windows Media Audio (*.wma) " profile.
-
Set output mode: After selecting certain output format, the right panel will show general standard of the format, such as: Bit Rate, Sample Rate, Codec, etc. By clicking certain setting, you may specify it , or just keep the default settings.
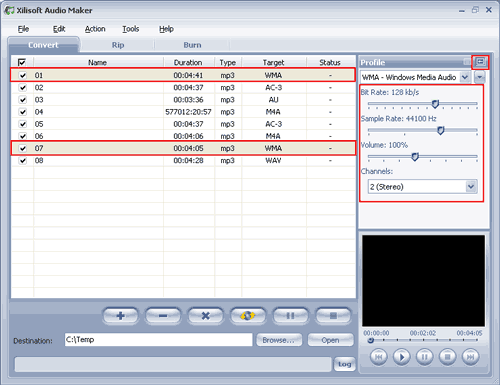
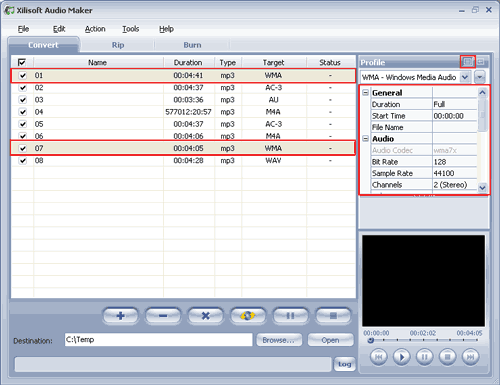
Tips: there are two modes – Simple Mode and Professional Mode.
With Simple Mode, you can adjust the output settings by sliding the slider. You can select the mode by clicking the button.
With Professional Mode, you can adjust more professional preferences by adjust the Preference List, such as: Duration, ID3, Volume, Bit Rate, Sample Rate, Codec, etc. You can select the mode by clicking the
 button.
-
To set the folder that you want to save your target files, you may select the output folder by clicking "Browse…" button or directly enter a path in the "Destination" box. "C:Temp" is set as the default destination folder.
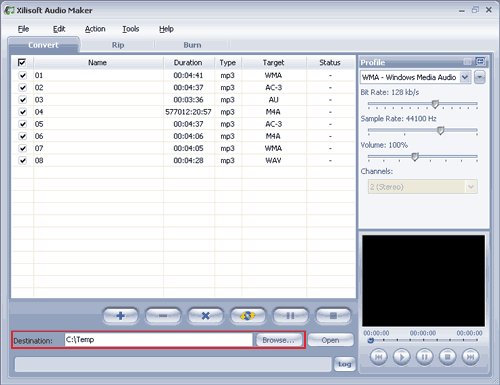
-
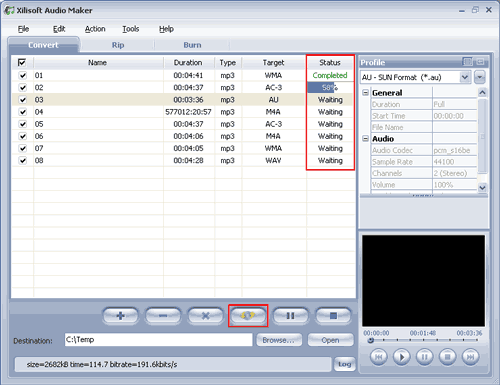
At the last step, just click "Convert" button to start your conversion. You can see "Completed" under the "Status" column which means you got a successful conversion. What to do now? Just enjoy your music. Our software keeps the quality as good as the original files.
