Xilisoft DVD Snapshot for Mac Tutorial
This tutorial will show you how to capture photos from DVD disc and DVD folder in batches or singly, and output them as static picture, flash animation and HTML page on your Mac computer. After download and install DVD Snapshot for Mac on your Mac, you can follow the steps below to accomplish the capture.
Step 1: Load DVD
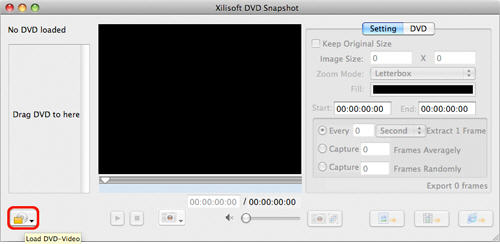
Insert DVD into your DVD-ROM, run DVD Snapshot for Mac, and then click the "Load DVD Video" button to load DVD disc or DVD folder. After loading, all the DVD titles are displayed in the left file list.
Step 2: Select a title and set output parameters
In the file list, select a title from which you want to capture pictures, and you can custom the output parameters in the "Setting" tab on the right panel.
If you don't want to keep original size, you can uncheck the "Keep Original Size" option and type the wanted value in the "Image Size" textbox, choose an image zoom mode from the "Zoom Mode" drop down list, choose a fill color for the image margin in the "Fill" option.
And if you want to capture images from a segment of the selected title, you can type the exact start and end time of the segment in the "Start" and "End" textbox.
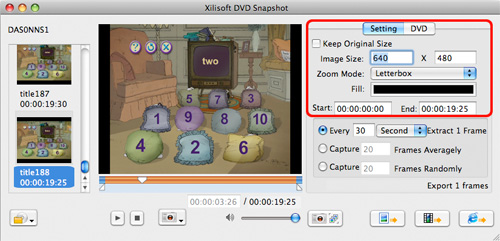
Furthermore, you can also go to the "DVD" tab to choose the subtitle, angle and audio track of the DVD.
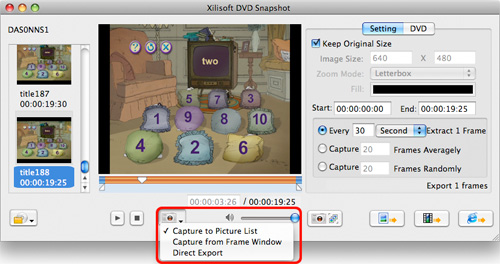
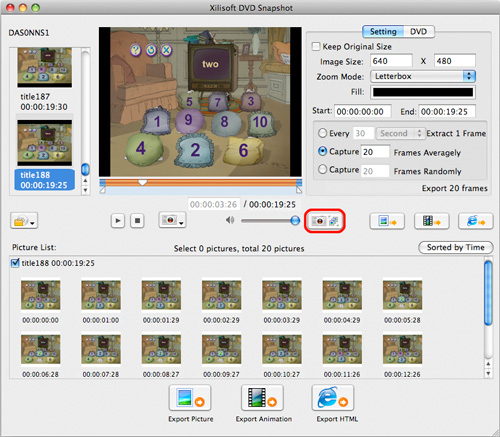
Tip: If you want, you can preview the selected title via the built-in player. When previewing, you can also take a snapshot by the button beside "Stop". Long-press on the button and choose an option from the drop-down list.
1. Choose "Capture to Picture List" option to snap the current image to picture list that opens;
2. Choose "Capture for Frame Window" option to open the frame list, and the current image will be highlighted. Click the "Add" button to add it to the picture list, or pick out the best ones from the images before and after it;
3. Choose "Direct Export" option to export the current picture and save as JPEG on your Mac directly.
Step 3: Choose batch capture rule
The software provides three batch capture rules at the bottom of the "Setting" panel:
1. Capture a frame every given seconds/minutes/hours/frames;
2. Capture pictures with the given value averagely;
3. Capture pictures with the given value randomly.
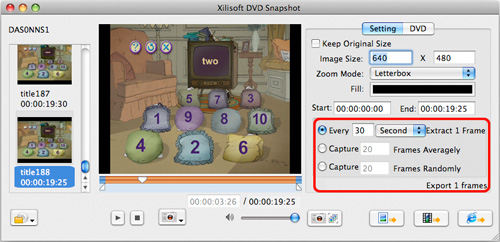
After choosing capture rule, the picture numbers to be captured is displayed right below automatically.
Step 4: Capture pictures to picture list
After the above settings are ok, click the "Batch Capture Pictures" button to start capturing pictures in batches to the picture list that opens up at the bottom of the main window. You can check the capture process by the progress bar that appears.
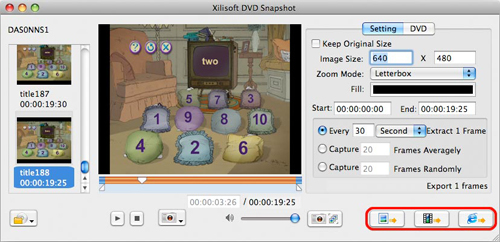
Tip: you can also directly output the pictures in batches via the "Export Picture", "Export Animation" or "Export HTML" button at the right bottom of the main window.
When this capturing completed, you can capture pictures from other titles.
Step 5: Adjust photos to output in the picture list
After all the pictures you want, classified by title, are captured into the picture list, you can also adjust them for exporting in the picture list.
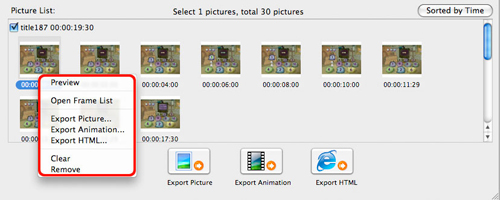
In the right-click menu. you can preview the selected picture in the "Preview" window, open the frame list to replace the selected picture or add more pictures, export the selected ones, clear the picture list, and only delete the selected ones from the picture list.
Step 6: Export
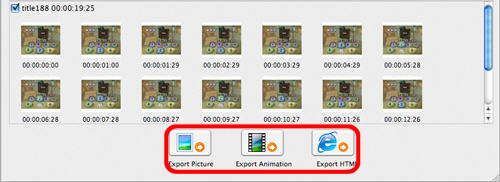
At the bottom of the picture list, there're three buttons provided for you to export pictures in static images, animation, or html page.
Export photos as JPEG, BMP, PNG or GIF
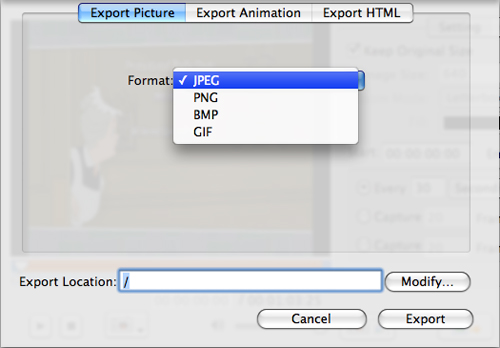
Click the "Export Picture" button to open the "Export Picture" window.
Set the output picture format from the "Format" drop down list, click the "Modify" button to choose the export location, and then click the "Export" button to start exporting.
Export photos as GIF or Flash animation
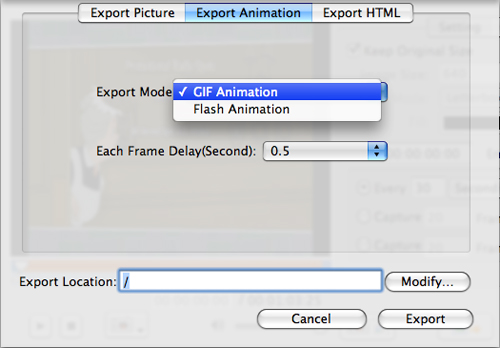
Click the "Export Animation" button to open the "Export Animation" window, choose the export mode, type a value in the "Each Frame Delay(Second)" textbox to customize the time delay between every frame in the animation and choose the export location. Then click the "Export" button and you will get your desired animation soon.
Export photos as HTML page
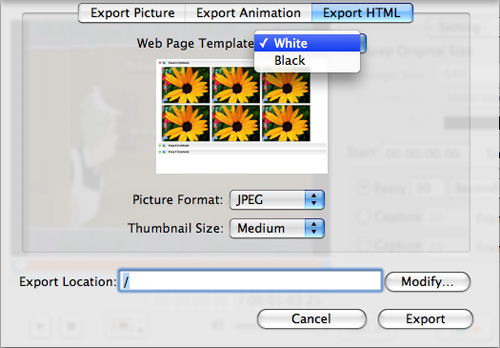
Click the "Export HTML" button, choose web page template, picture format, thumbnail size and the export location. Then click the "Export" button and you will get what you want.
You can get the exporting process via the progress bar that appears when the exporting starts.


