How to convert videos to Xbox?
Microsoft’s Xbox 360 gaming console is one of the most popular ever. It’s a great thing sitting around and playing games with friends and you can even play videos, DVDs and music CDs on the console.
I have a bunch of videos in .avi that are taking up too much space but currently I don't have the funds to buy an external and I would like to just put them on my XboX 360 Hard Drive which is pretty empty aside from some DVDs and a few game saves. I want them playable on my XboX 360, then when I get an external I will have one USB going to the 360 and one to my computer for backup and storage.
One day I saw an article talking about how to make movies and music videos playable on XboX 360 from various video formats and got some ideas. Here, I’d like to share my experience with you guys. I use the Xilisoft Video Converter. This software has optimized the output formats for many digital devices like PSP, PS3, but not for XboX, which disappoints the guys who own XboX 360 like me. From the official site of Xbox 360, we know that it supports some video formats like WMV, HD-WMV, H.264, and MPEG-4.
Download Xilisoft Xbox Converter and install it.
Step 1: Load files
Click "Add File(s)" button on the toolbar or "File > Add File(s)" to load the files you want to convert.
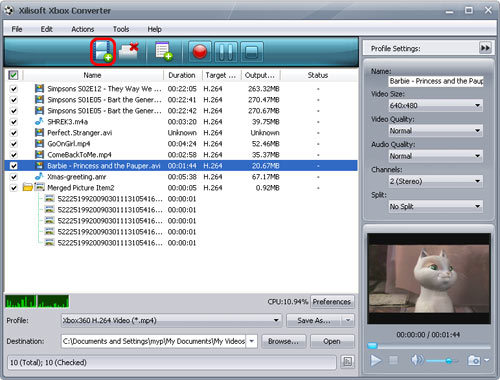
You can also click "File > Add Folder" to select the folder you want to add, then all files in the folder will be loaded into the file list.
Step 2: Choose output format and folder
Choose the file, click to open "Profile" drop-down list in the "Target Profile" column or at the bottom of the main interface, then choose the format you want.
Click "Browse" button to choose the destination folder for saving the output files.
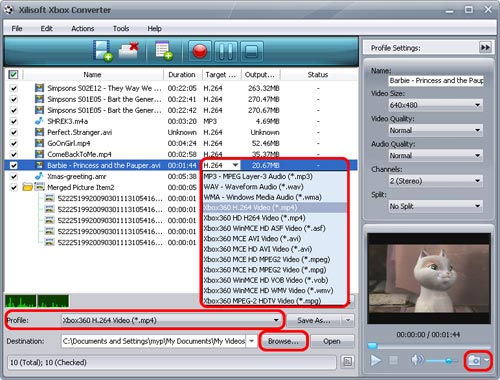
Tip1: Click "Snapshot" button below the preview windows on the right-bottom of the main interface to take a snapshot during preview to save as BMP file.
Tip 2: You can double click the loaded file in the file list to view the file information.
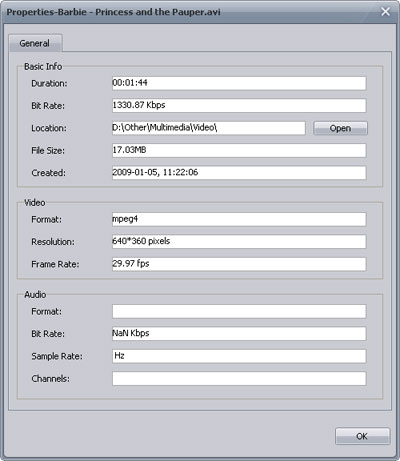
Tip 3: If you want to do more with your video and audio files before converting, please go to Step 3, otherwise jump to Step 4.
Step 3: Adjust output settings
1. Add multiple profiles for the same source file
Select the file and click the "Add Profile" button to add a default profile to the file, then select the profile you want from the "Profile" drop-down list. In this way, you can get them converted in one click.
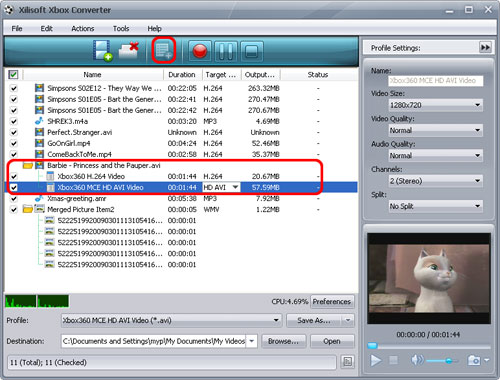
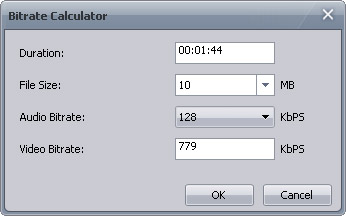
2. Customize output file size with Bitrate Calculator
To customize the output file size, select the video file and click "Tools > Bitrate Calculator", and input the file size you want, then the video bit rate will be calculated. Click "OK" button, the size you enter will be displayed in the "Output Size" column.
3. Set the output parameters
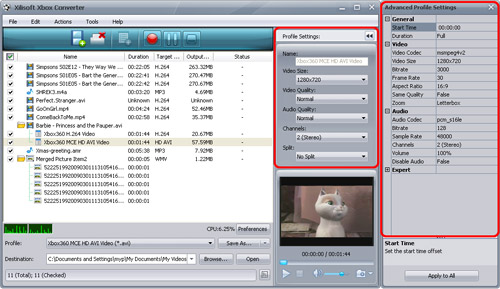
On the "Profile Settings" panel, you can set the following parameters: Name, Video Size, Video Quality, Audio Quality, Channels. Click "Show Advanced Profile Settings" button to expand the advanced profile settings page, in which you can set more parameters for satisfying more needs.
After the above settings, click "Convert" button on the toolbar to start converting. You can pause, resume or stop the conversion at any time.
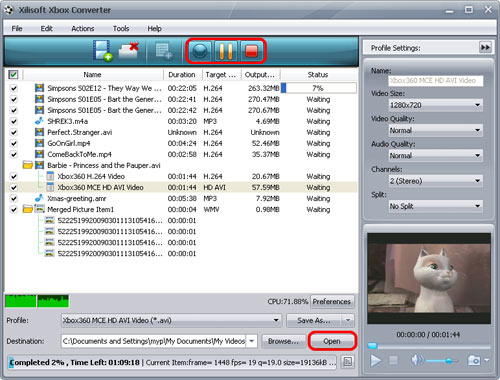
After conversion, you can click "Open" button on the bottom to view the output files directly.
After that, you can freely convert your favorite videos to the XboX 360 supported video format and enjoy the wonderful visual feast on your TV using XboX 360.
Is it pretty simple? JUST try this!


